


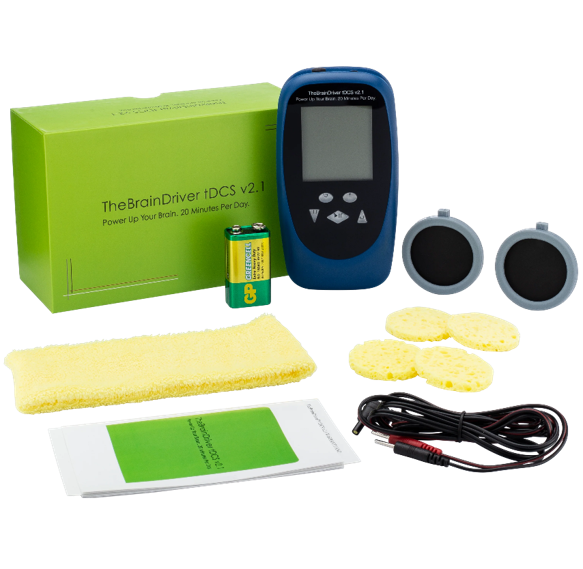
Setting up gear the night before saves a surprising amount of morning frustration. A portable brain stimulation device works best when the person using it follows a few small habits that keep sessions consistent day after day. Rushing through setup, grabbing half-dry sponges or skipping a quick cable check, tends to show up as an uncomfortable or interrupted session. None of this requires special training. It just asks for a bit of attention before you sit down.
alt tag – portable brain stimulation device
Preparing equipment properly isn’t about rigid rules. It’s about making each session predictable, so you can judge your own experience fairly over time.
Step 1: Check the Device
Before anything touches your skin, glance over the unit itself. Battery strength, cable condition, and the current and timer settings all deserve thirty seconds of attention. Many home units, including 9-volt models, can cut out or behave inconsistently when the battery runs low, so keeping a spare nearby saves hassle.
Cables fray with repeated use, especially near the connector ends. Catching a loose wire early prevents interrupted sessions and the annoying restart that follows.
Step 2: Prepare the Skin
Skin oils and leftover lotion can interfere with contact. A quick wipe with a damp cloth on the areas where the sponges will sit removes buildup that would otherwise weaken the connection.
Avoid placing sponges over broken, sunburned, or irritated skin. If the area isn’t in good condition, it’s better to skip the session that day.
Step 3: Moisten the Sponges
Sponges should be evenly damp, not dripping. Manuals typically specify saline solution or water, so follow the instructions that came with your device.
Too little moisture can make contact uneven and uncomfortable, while too much can let liquid run beyond the intended area. A quick squeeze test, where the sponge feels wet but doesn’t drip, is a simple way to judge it.
Step 4: Position the Electrodes Carefully
Placement matters more than most beginners assume. Electrodes should sit where your chosen montage indicates, since placement that drifts noticeably off the mapped position changes which area receives the most current. These tDCS electrode placement maps show common positions based on the 10-20 system.
Using a mirror, or asking someone to double-check placement the first few times, builds a habit that eventually becomes automatic. Measuring from fixed points, like the bridge of the nose or the top of the ear, keeps positions repeatable.
Step 5: Secure the Headband Without Overtightening
A snug headband keeps sponges from shifting mid-session, but pulling it too tight causes discomfort. The right tension holds steady without pressing hard into the scalp.
During longer sessions, a quick check partway through catches any slack before contact starts to suffer.
Step 6: Start, Monitor, and Finish Calmly
Set the current and timer according to the manual, and let any built-in ramp-up do its job rather than jumping straight to a higher level. The TheBrainDriver instruction manual walks through these settings step by step.
If you notice sharp pain or burning, stop the session and recheck sponge moisture and placement before trying again another day.
Step 7: Clean and Store Your Gear
Rinse sponges gently after each use, without soaking the electrode connectors, and let everything air-dry fully before storing it. Damp storage is what causes the musty smell that neglected gear sometimes develops.
A dry case is better than a bathroom drawer. This small habit keeps components in good condition for longer and saves money on early replacements.
Frequently Asked Questions
Should I use water or saline on tDCS sponges?
Follow the instructions in your device manual. Many manuals specify saline solution, and the key is that sponges are evenly damp without dripping.
How long does setup usually take?
Once the routine becomes familiar, most of the steps above take only a few minutes, including checking the device, moistening the sponges, and positioning the electrodes.
What should I do if a session feels uncomfortable?
Stop the session, then check sponge moisture, electrode placement, and headband fit. If discomfort continues, don’t resume until you’ve reviewed the manual.
Conclusion
Good preparation habits build quietly over time, and the difference between a rushed setup and a careful one shows up in how comfortable and consistent each session feels. None of these steps take long once they become familiar.
For detailed setup guides, placement maps, and device care tips, thebraindriver.com is a helpful place to start.
